Google Tag Manager (GTM) requires previous installation of GTM script on your
website in order to be able to apply changes to your domain. The installation
steps are shown when you first sign up to GTM.
Step 1: Obtain the Monitoring Script
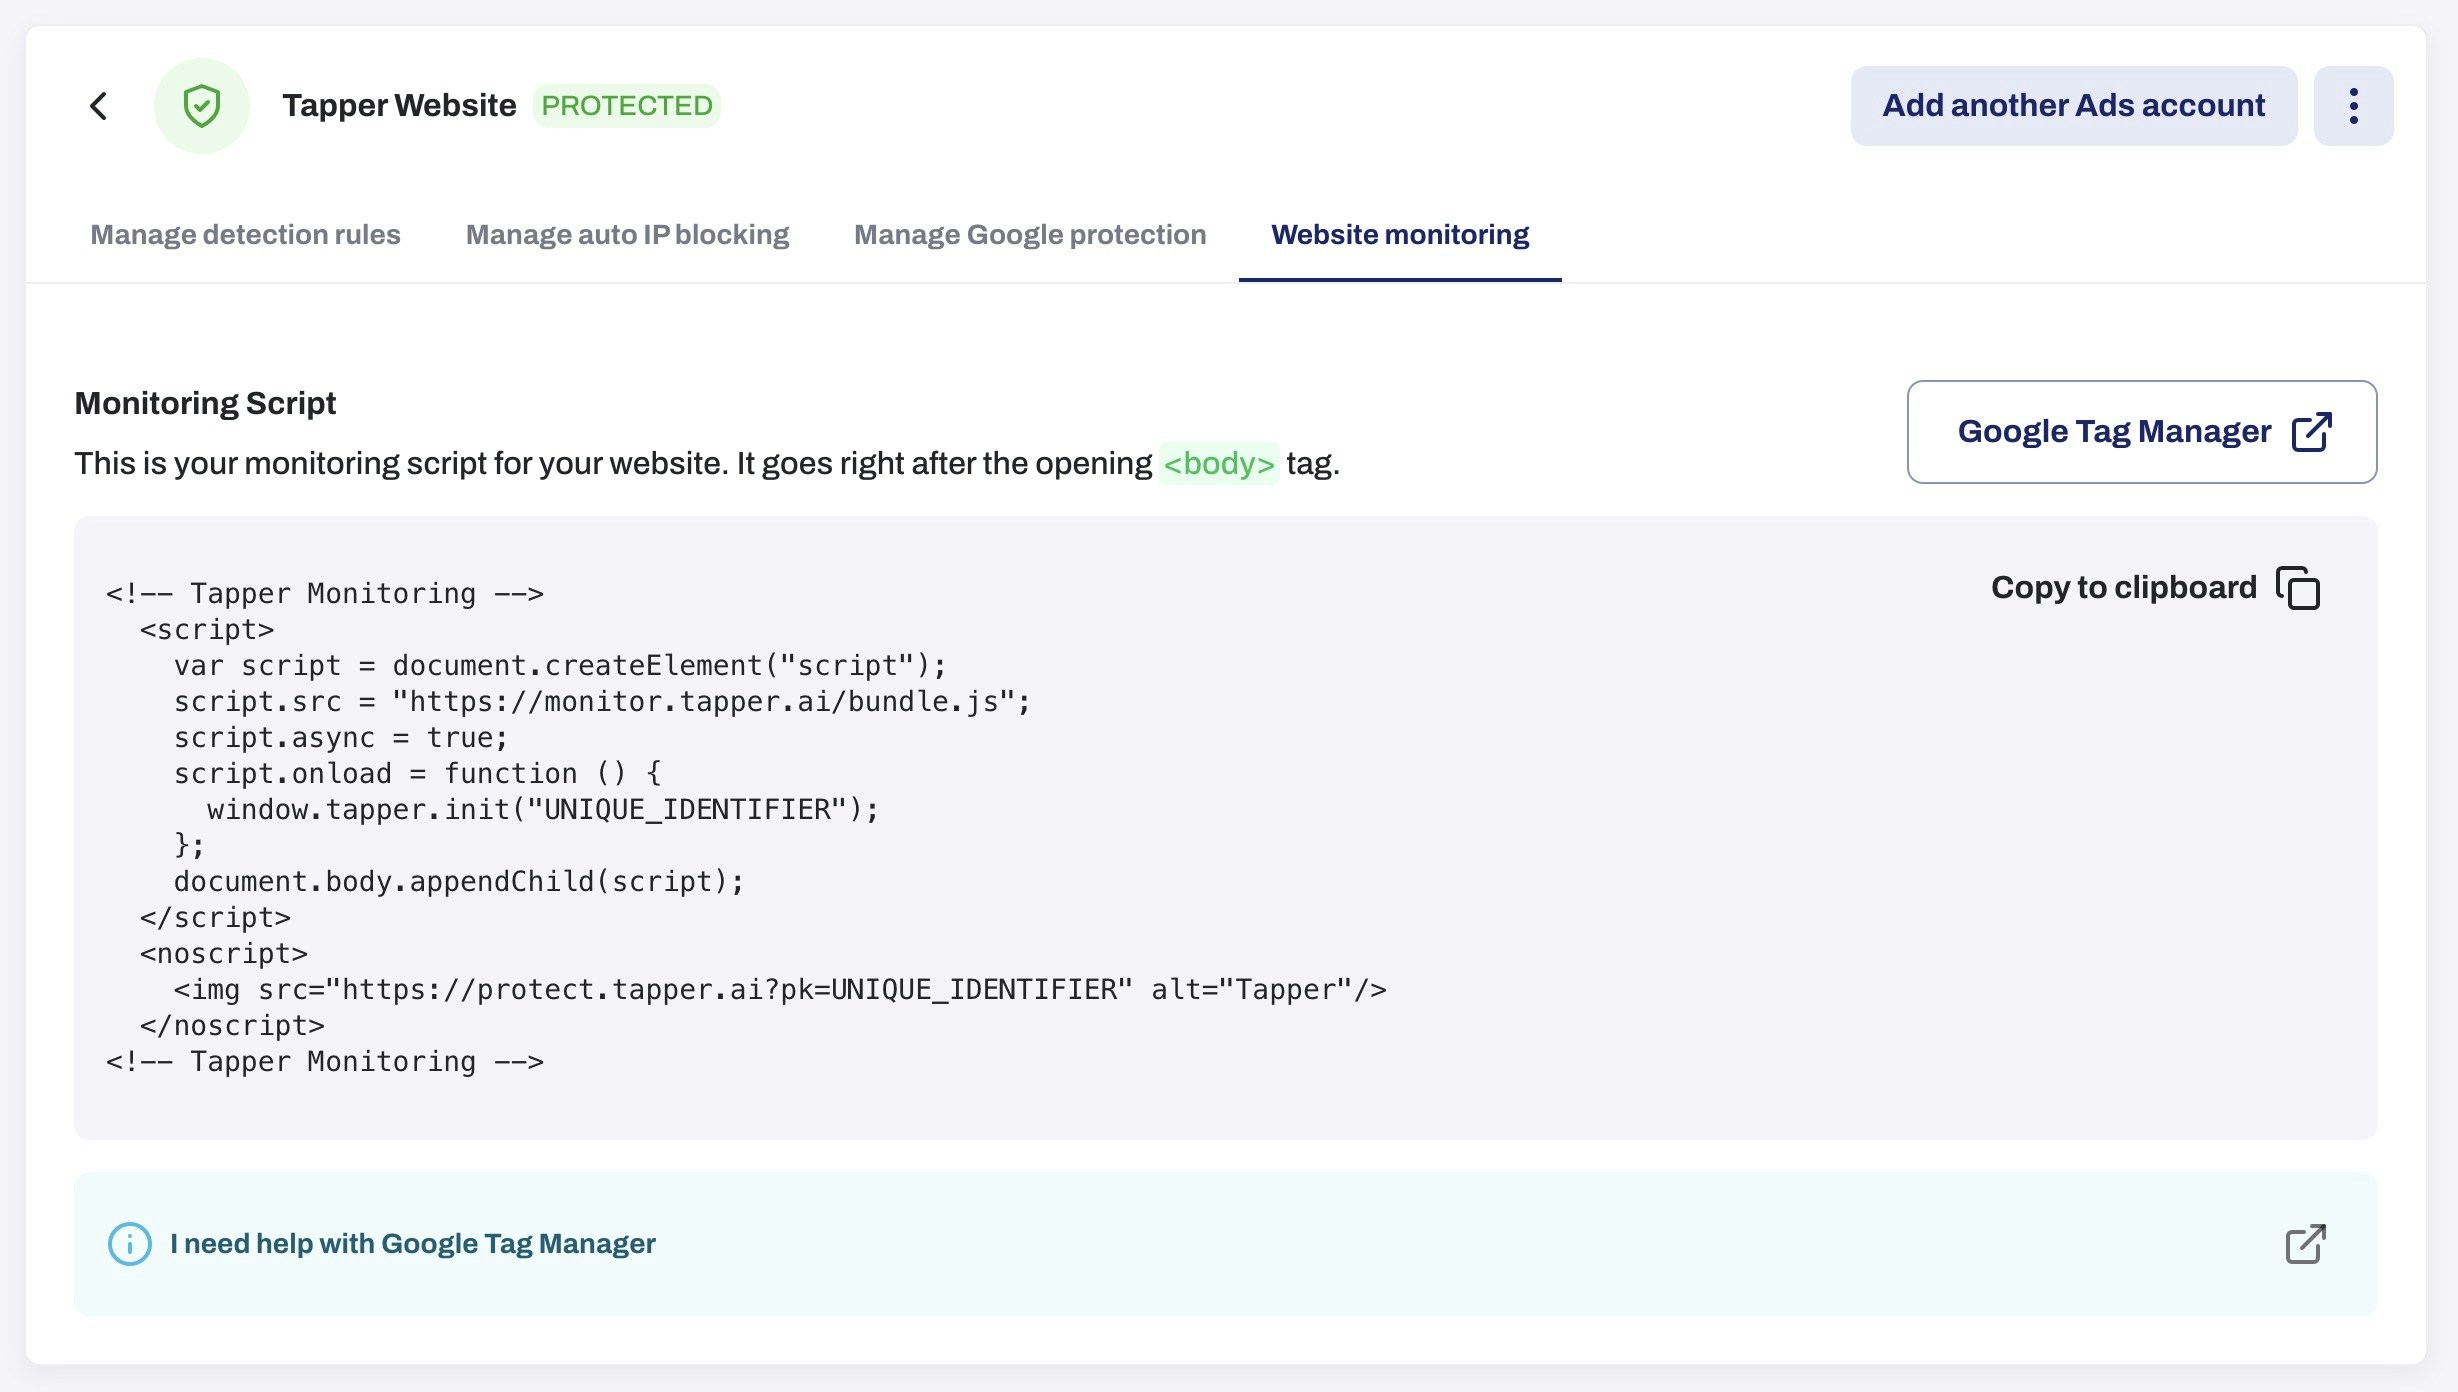
The Monitoring Script can be found under Website monitoring for the desired Protected Website. Copy the code and navigate to Google Tag Manager.
Step 2: Add the Script
Option A: Manually Add to HTML
- Open the HTML file of your website.
- Paste the copied monitoring script just before the closing
</body> tag.
Option B: Add via Google Tag Manager
-
Create a New Tag in GTM
- Navigate to Tags in your GTM dashboard.
- Click the New button to create a new tag.
-
Set Up the Tag Configuration
- Select Tag Configuration.
- Choose Custom HTML as the tag type.
- Paste the copied monitoring script into the HTML field provided.
-
Choose the Built-In Trigger
- Under Triggering, select the built-in trigger named Initialization - All Pages to ensure the script executes during the initial loading phase of every page.
-
Name and Save the Tag
- Give your tag a descriptive title such as Tapper - Monitoring Script.
- Click Save to store the tag configuration.
-
Publish Changes in GTM
- Click Submit to publish your new tag configuration.
- Enter a version name and description detailing the monitoring script addition.
- Confirm by clicking Publish to apply the changes to your website.
Step 3: Verify the Script is Active
- Utilize GTM’s Preview mode to ensure correct tag firing across your website.
- Alternatively, perform a live test on your website and inspect the page source or use developer tools to confirm the script is executing.
By completing these steps, you will have installed the monitoring script successfully across your entire website, with activation at each page’s initialization for optimal monitoring and data collection.